How to layer multiple windows in SwiftUI
 @zntfdr
Sometimes our apps require to display UI on top of what's on screen: a global alert, a HUD/toast, etc.ZStack is the closest official SwiftUI answer for such needs, and we've covered an example here.
However, ZStack falls short as soon as we present a sheet or a fullScreenCover:ZStack's presentation is bound to the views it contains.
In this article, let's see how we can overcome this challenge and much more.
Code examples are provided at the end of the article.
The challenge
Picking up from where we left in Custom HUDs in SwiftUI, the current limitation manifests as soon as we present something on top of the view associated with our HUD:

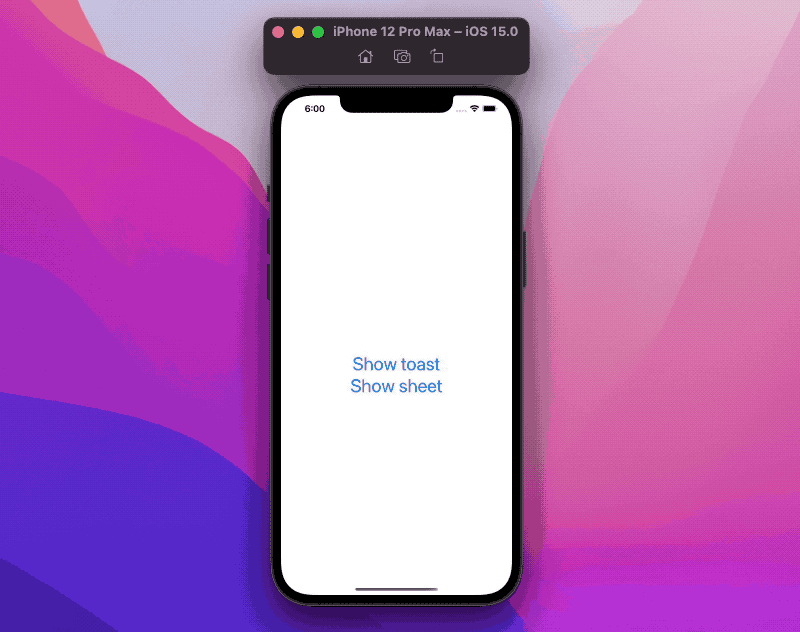
Instead, we want always to show our HUD on top of the screen, regardless of what's happening in our app:
App UI hierarchy
Everything we see on apps is placed on top of UIWindows. A window delivers touch events to the correct views and responds to other events such as (device) orientation changes.
With the introduction of multiple windows support for iPad (and Catalyst), UIWindows are associated with and managed by UIScenes, which representing a UI instance of our app.
We don't need to interact with either of them most of the time, especially with SwiftUI's new life cycle. However, even on SwiftUI apps, those components are still set up and used behind the curtain.
Lastly, we use a UISceneDelegate/UIWindowSceneDelegate to respond to various events related to our UIScene (and associated UISceneSession).
While a UIScene is normally set up with one window, scenes support multiple windows.
How to add extra windows to an app
Two requirements:
- keep a strong reference to the window
- provide the associated scene (a
UIWindowSceneinstance)
Scenes do manage UIWindows, but we own the window life-cycle:
if only the scene holds a reference to the window, the window will be de-allocated (and its UI won't show in the app).
Since we get our app's UIWindowScene instances via our UISceneDelegate/UIWindowSceneDelegate, adding windows there is probably the easiest way to do so.
The scene delegate
If we refer to the scene delegate of an app using the UIKit life-cycle, we will see something similar to:
class SceneDelegate: UIResponder, UIWindowSceneDelegate {
  var window: UIWindow?

  func scene(
    _ scene: UIScene,
    willConnectTo session: UISceneSession,
    options connectionOptions: UIScene.ConnectionOptions
  ) {
    let contentView = ContentView()

    if let windowScene = scene as? UIWindowScene {
      let window = UIWindow(windowScene: windowScene)
      window.rootViewController = UIHostingController(rootView: contentView)
      self.window = window
      window.makeKeyAndVisible()
    }
  }

  ...
}
The scene delegate is responsible for setting up the app's main window in scene(_:willConnectTo:options:).
SceneDelegate meets the windows requirements mentioned earlier:
- it keeps a strong reference to the window via its
var window: UIWindowproperty - it provides the associated scene during the window initialization via
let window = UIWindow(windowScene: windowScene)
Because a scene supports multiple windows, we can add as many windows as we like, for example:
class SceneDelegate: UIResponder, UIWindowSceneDelegate {
  var keyWindow: UIWindow?
  var hudWindow: UIWindow?

  func scene(
    _ scene: UIScene,
    willConnectTo session: UISceneSession,
    options connectionOptions: UIScene.ConnectionOptions
  ) {
    if let windowScene = scene as? UIWindowScene {
      setupKeyWindow(in: windowScene)
      setupHUDWindow(in: windowScene)
    }
  }

  func setupKeyWindow(in scene: UIWindowScene) {
    let window = UIWindow(windowScene: scene)
    window.rootViewController = UIHostingController(rootView: MainSceneView())
    self.keyWindow = window
    window.makeKeyAndVisible()
  }

  func setupHUDWindow(in scene: UIWindowScene) {
    let hudWindow = UIWindow(windowScene: scene)
    let hudViewController = UIHostingController(rootView: HUDSceneView())
    hudViewController.view.backgroundColor = .clear
    hudWindow.rootViewController = hudViewController
    hudWindow.isHidden = false
    self.hudWindow = hudWindow
  }
}
For simplicity's sake, we will add windows right from the app launch. We can add them whenever we like in our apps, as long as we meet the two requirements above.
Where:
- we set up the main window as before, named
keyWindow - we set up a secondary window, named
hudWindow
The setup for this secondary (and any other) window doesn't match 1-1 the set up for the main window:
- we don't call
makeKeyAndVisible()on the secondary window. There can be only one key window per scene, receiving keyboard and other non-touch-related events. Instead, we make sure that secondary windows are visible viaisHidden = false - we make the
UIHostingController's view background color transparent. Otherwise, the main window would be hidden by the secondary window.
For apps using the SwiftUI life-cycle, everything we've seen so far still holds true, with a couple of differences:
- we must associate the app with a scene delegate, check out How to add an AppDelegate and a SceneDelegate to a SwiftUI app on how to do so
- we don't have to set up/manage the key window in our scene delegate: SwiftUI does that for us (on a private
SwiftUI.AppSceneDelegate).
Windows hierarchy and behaviors
With the current setup, we're able to layer as many windows as we like, with one caveat:
only the topmost window receives touches.
The scene delegate places its windows in a stack.
When the user interacts with the screen, touches are received by the topmost window in that stack.
There could also be multiple stacks of windows if we have windows at different window levels.
This is because all windows are part of the app responder chain. Unless this behavior is what we need, we can change so by either sub-classing UIWindow, or setting the proper UIWindow properties in the scene delegate.
Non-interactive window
For example, we could make a window ignore touches by setting isUserInteractionEnabled = false:
/// in our scene delegate:

func setupNonInteractiveWindow(in scene: UIWindowScene) {
  let nonInteractiveWindow = UIWindow(windowScene: scene)

  let controller = UIHostingController(rootView: NonInteractiveView())
  controller.view.backgroundColor = .clear
  nonInteractiveWindow.rootViewController = controller
  nonInteractiveWindow.isHidden = false
  nonInteractiveWindow.isUserInteractionEnabled = false // 👈🏻
  self.nonInteractiveWindow = secondWindow
}
This window would be used exclusively for visualization purposes, and all touches would be ignored and received by the next window in the stack.
Pass through window
Most of the time, we probably want our window to:
- handle user interactions when the interaction touches something shown in that window
- pass the interaction to other windows otherwise
At first, this seems particularly tricky when presenting SwiftUI views, as this UIWindow interactions management is only possible via UIKit's responder chain.
However, there is a way.
In both UIKit and SwiftUI, a view does not receive touches when any of the following conditions is true:
- the view opacity is less than
0.01(alpha = ...in UIKit):
Button("This button can be tapped") {
  // ...
}

Button("This button also can be tapped") {
  // ...
}
.opacity(0.01)

Button("This button *cannot* be tapped") {
  // ...
}
.opacity(0.001) // 👈🏻
- the view doesn't allow hit testing (
isUserInteractionEnabled = falsein UIKit):
Button("This button cannot be tapped") {
  // ...
}
.allowsHitTesting(false)
- the view is hidden (
isHidden = truein UIKit):
Button("This button cannot be tapped") {
  // ...
}
.hidden()
If no SwiftUI view responds to the user touch, then the containing UIHostingController's (UI)view will.
With these two pieces of information, we can create a UIWindow subclass that handles touches only when anything but the UIHostingController (UI)view is hit:
class PassThroughWindow: UIWindow {
  override func hitTest(_ point: CGPoint, with event: UIEvent?) -> UIView? {
    // Get view from superclass.
    guard let hitView = super.hitTest(point, with: event) else { return nil }
    // If the returned view is the `UIHostingController`'s view, ignore.
    return rootViewController?.view == hitView ? nil : hitView
  }
}
And this is how we achieve the toast behavior seen at the beginning of the article.
Sharing state between windows
Recommended read: App-wide state in SwiftUI.
From SwiftUI point of view, different windows could be as well as different apps:
they do not share the environment or any other state.
However, at least with UIKit's life-cycle, they have a common starting point: the scene delegate.
We could define a shared state in this delegate, that is then injected to the relevant windows, for example:
class SharedState: ObservableObject {
  ...
}

final class SceneDelegate: UIResponder, UIWindowSceneDelegate {
  lazy var sharedState = SharedState()

  var keyWindow: UIWindow?
  var secondaryWindow: UIWindow?

  func scene(
    _ scene: UIScene,
    willConnectTo session: UISceneSession,
    options connectionOptions: UIScene.ConnectionOptions
  ) {
    if let windowScene = scene as? UIWindowScene {
      setupKeyWindow(in: windowScene)
      setupSecondaryWindow(in: windowScene)
    }
  }

  func setupKeyWindow(in scene: UIWindowScene) {
    let window = UIWindow(windowScene: scene)
    window.rootViewController = UIHostingController(
      rootView: MainSceneView().environmentObject(sharedState) // 👈🏻 shared state
    )
    self.window = window
    window.makeKeyAndVisible()
  }

  func setupSecondaryWindow(in scene: UIWindowScene) {
    let secondaryViewController = UIHostingController(
      rootView: SecondarySceneView().environmentObject(sharedState) // 👈🏻 shared state
    )
    secondaryViewController.view.backgroundColor = .clear

    let secondaryWindow = PassThroughWindow(windowScene: scene)
    secondaryWindow.rootViewController = secondaryViewController
    secondaryWindow.isHidden = false
    self.secondaryWindow = secondaryWindow
  }
}
Regardless of where changes come from, any change in this shared state will be observed by all windows.
In an app using the SwiftUI life-cycle, things are slightly trickier, as we don't have this common starting point, instead:
- the
Appwill hold the shared state, which is then injected into the main view - the main view will inject the shared state to our scene delegate
- once injected in the scene delegate, the secondary windows are created, and the state is injected in their views
Both examples with UIKit and SwiftUI life-cycle are provided here.
Conclusions
Layering multiple windows is not something we do very often nowadays. However, it's a need quickly justified even on simple apps (see HUD example above).
As this nearly 1500-words article has shown us, SwiftUI window support is far from ready (FB9018136), but, fortunately, it is achievable by going back to UIKit and work with some knowledge on both UI frameworks.
Do you use multiple windows in your apps? What are your use cases? Please let me know via email or Twitter.