The Right Way To Write Dijkstra’s Algorithm In Swift 👾
 @zntfdr
Update: this project is now open source.
Last week I’ve written about how to code the famous Dijkstra’s Algorithm in Swift: this article is its follow up.
My Reason
I didn’t write the previous article and spent time doing research just for the article’s sake: a similar algorithm is implemented in all my 🚇 Metro Apps.
With this article I’m going to show you why you don’t need to follow my same path, by taking advantage of the tools offered by Apple and obtain the same result with much less effort (while gaining other benefits as well).
Introducing GameplayKit
Among the dozens of Apple’s frameworks there’s GameplayKit: this framework is always available to you, regardless of whether your App is game or not.
But what is GameplayKit? I’m glad you asked! I’ll let Apple’s GameplayKit Guide answer this for you:
GameplayKit is a collection of foundational tools and technologies for building games in iOS, OS X, and tvOS. Building, evolving, and maintaining a sophisticated game requires a well-planned design — GameplayKit provides architectural tools to help you design modular, scalable game architecture with minimal effort.Wow, this framework sounds like a lot of stuff!
GameplayKit Cores

GameplayKit Cores
Let’s use the Divide And Conquer Paradigm to understand this GameplayKit better, here are its main cores (from Apple’s GameplayKit Guide):
- Randomization Use these robust, flexible implementations of standard algorithms as the building blocks for many kinds of game mechanics.
- Entities and Components Design more reusable gameplay code by building on this architecture.
- State Machines Use this architecture to untangle complex procedural code in your gameplay designs.
- The Minmax Strategist Create a model for your turn-based game and AI player objects that use the model to plan optimal moves.
- Pathfinding Describe a game world as a graph, allowing GameplayKit to plan optimal routes for game characters to follow.
- Agents, Goals, and Behaviors Use this simulation to let game characters move themselves based on high-level goals and react to their surroundings.
- Rule Systems Separate game design from executable code to speed up your gameplay development cycle, or implement fuzzy logic reasoning to add realistic behavior to your game.
Wait….what’s the fifth point again?
5. Pathfinding Describe [...] world as a graph, […] plan optimal routes [...]
This sounds a lot like what we’re trying to do! Let’s dig deeper.
GameplayKit Pathfinding If you read the whole Pathfinding introduction, you’ll discover that we can use it in three cases:
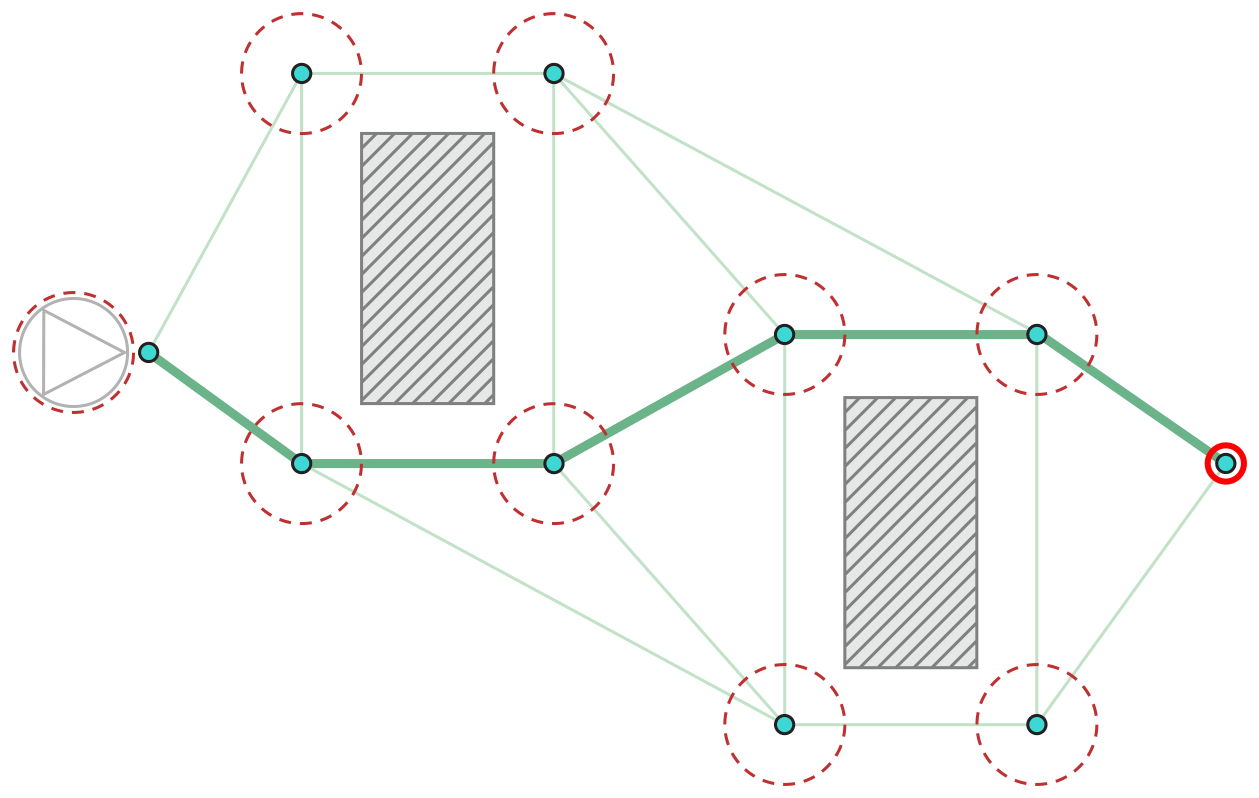
- Case 1 — A Continuous space interrupted by obstacles
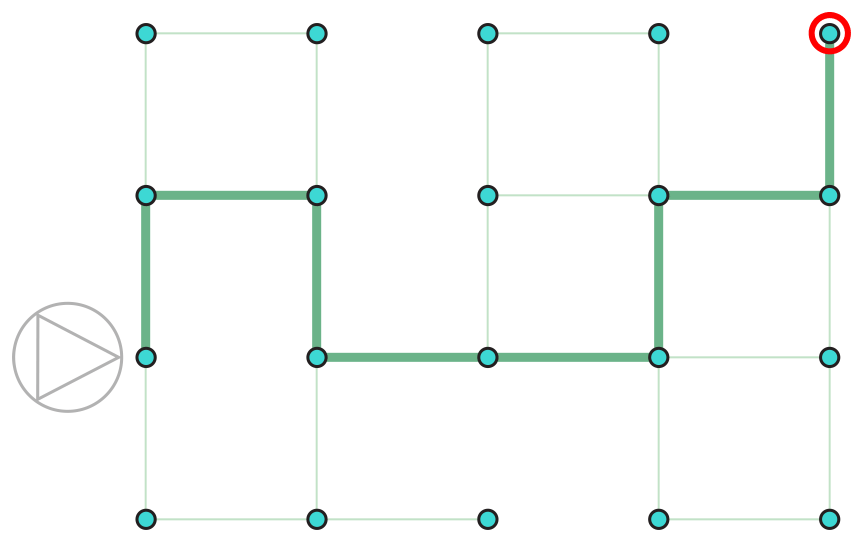
- Case 2 — A discrete two-dimensional grid, where the only valid locations are those with integer coordinates
- Case 3 — A collection of discrete locations and the connections between them.
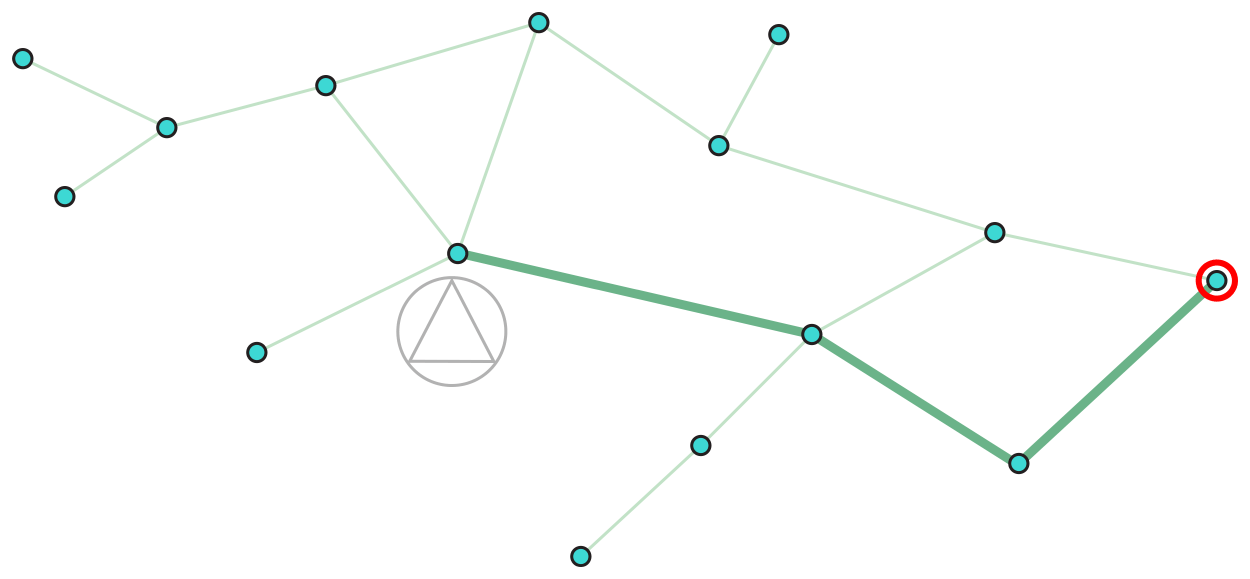
Wow! The third case sounds exactly what we’re trying to do! 🙌🏻 Let’s implement it!
GameplayKit Entities
Graph
Firstly, GameplayKit want us to create a new graph, this is done by creating a new GKGraph instance:
let myGraph = GKGraph()
Nodes
Secondly, we will need to define our nodes: again, GameplayKit has us covered with its GKGraphNode class:
let nodeA = GKGraphNode()
let nodeB = GKGraphNode()
let nodeC = GKGraphNode()
let nodeD = GKGraphNode()
let nodeE = GKGraphNode()
Please don’t forget to add them into our Graph:
myGraph.add([nodeA, nodeB, nodeC, nodeD, nodeE])
Node Connections
While I created a different class for the Connections, GameplayKit takes a much easier approach and just offers a GKGraphNode method addConnection(to:[GKGraphNode], bidirectional: Bool):
nodeA.addConnections(to: [nodeB, nodeD], bidirectional: true)
nodeB.addConnections(to: [nodeD], bidirectional: true)
nodeC.addConnections(to: [nodeE], bidirectional: false)
nodeD.addConnections(to: [nodeC], bidirectional: false)
GameplayKit way is much simpler than mine: this is because Apple’s framework assumes each connection weight to always be the same (I will take care of this point at the end of the article).
Dijkstra’s Algorithm
We’ve now defined the whole Graph! The only thing missing is the shortest path finder algorithm: how do we go from nodeA to nodeEs? Well…
myGraph.findPath(from: nodeA, to: nodeE)
Yup, that’s one line.
Wait, what? That’s it? Yes, the findPath method returns us an array of nodes that describe the path from the start node to the target node, or an empty array if there’s no path between the two nodes. 🎉🎉
Complete Code
Just to make you understand how amazing GameplayKit is, here’s the full code we’ve written so far (you can run it in a Xcode/Swift Playground):
import GameplayKit

let myGraph = GKGraph() // declaring the Graph
let nodeA = GKGraphNode() // declaring the Graph Nodes
let nodeB = GKGraphNode()
let nodeC = GKGraphNode()
let nodeD = GKGraphNode()
let nodeE = GKGraphNode()

myGraph.add([nodeA, nodeB, nodeC, nodeD, nodeE]) // adding the Graph Nodes to the Graph
nodeA.addConnections(to: [nodeB, nodeD], bidirectional: true) // declaring the Graph Nodes connections
nodeB.addConnections(to: [nodeD], bidirectional: true)
nodeC.addConnections(to: [nodeE], bidirectional: false)
nodeD.addConnections(to: [nodeC], bidirectional: false)

let path: [GKGraphNode] = myGraph.findPath(from: nodeA, to: nodeE) // finding the path between two nodes
Our whole application now takes less lines of code than my shortestPath algorithm, it’s amazing how powerful this framework is! 🚀🚀🚀
Weighted Connections
One of the GameplayKit shortcomings is the lack of weighted connections between nodes.
I’ve tackled myself with this problem and found out an elegant minimal solution: subclass GKGraphNode and override the cost(to node: GKGraphNode) method. Here’s my quick implementation.
In short, each node stores its connections cost in its (new)travelCost property: everything else stays the same 💯
Final Note
The cool thing about GameplayKit is that we have no idea which shortestPath algorithm it uses: it could be Dijkstra’s, it could be Bellman–Ford’s, or it could be completely something else.
And you should not care, this has been taken care by very talented people at Apple, the problem is solved: by letting them taking care of this, we can focus on building better products 💯.
On the same vibe: Have you ever wondered which algorithm Swift uses when we call
sort?
Conclusions
Both this and my previous article has shown you a way to implement a shortestPath finder algorithm into your code.
The main reason why I like the latter much more than the former is, again, because most the core code of this option is maintained by dozens of people that work all year around in order to make it as fastest and as efficient as possible, while always taking advantage of the latest Apple hardware, and more.
If you write the code yourself, you’re the one maintaining: no one else will help you improve it, if there’s a bug, only you can find it and fix it. If you work on something else, that code will never improve (unless it’s open source).
If there’s one takeaway from this post, let it be this:
Take advantage of the tools that are offered to you: the less you depend on yourself, the more powerful you are.
Catch you in the next article! 👋🏻